How to trigger Zapier Zaps using Axiom.ai
You can connect your automation to Zapier, pass scraped data, and access 7,000+ apps. We'll guide you through using Axiom.ai's "Get data from URL" steps to post data to Zapier, setting up a Zap to receive the data, and using Zapier Formatter to extract it from an array.
# Getting started
To get started, you will need the following from the Axiom.ai Chrome extension:
- API key - The API key is found on the dashboard.
- Automation name - Get the name of the automation you wish to trigger.
- Endpoint - The current endpoint is
https://lar.axiom.ai/api/v3/trigger.
# Triggering a Zap using an Axiom.ai automation
To get started, we are going to assume that you have an automation created.
- Create Zap - Create a new Zap by navigating to Zapier, and clicking "+ Create".
- Add trigger - Click "Trigger", then select "Webhooks by Zapier". See the section below for more information on configuring this trigger.
- Trigger webhook - In Axiom.ai, add a Trigger webhook step to your automation. Input the URL from the "your webhook URL" section in Zapier.
Learn more about configuring the "Webhooks by Zapier" trigger:
- Set the "trigger event" to "catch raw webhook", press continue.
- Save the URL in the "your webhook URL" section for later.
To use data within your Zap, you'll need to first process the data:
- Actions - Add your actions to process the data that is being sent to the Zap, for this example, we will be using the "Formatter by Zapier" action.
- Configure - Follow the instructions below to configure the "Formatter by Zapier" action.
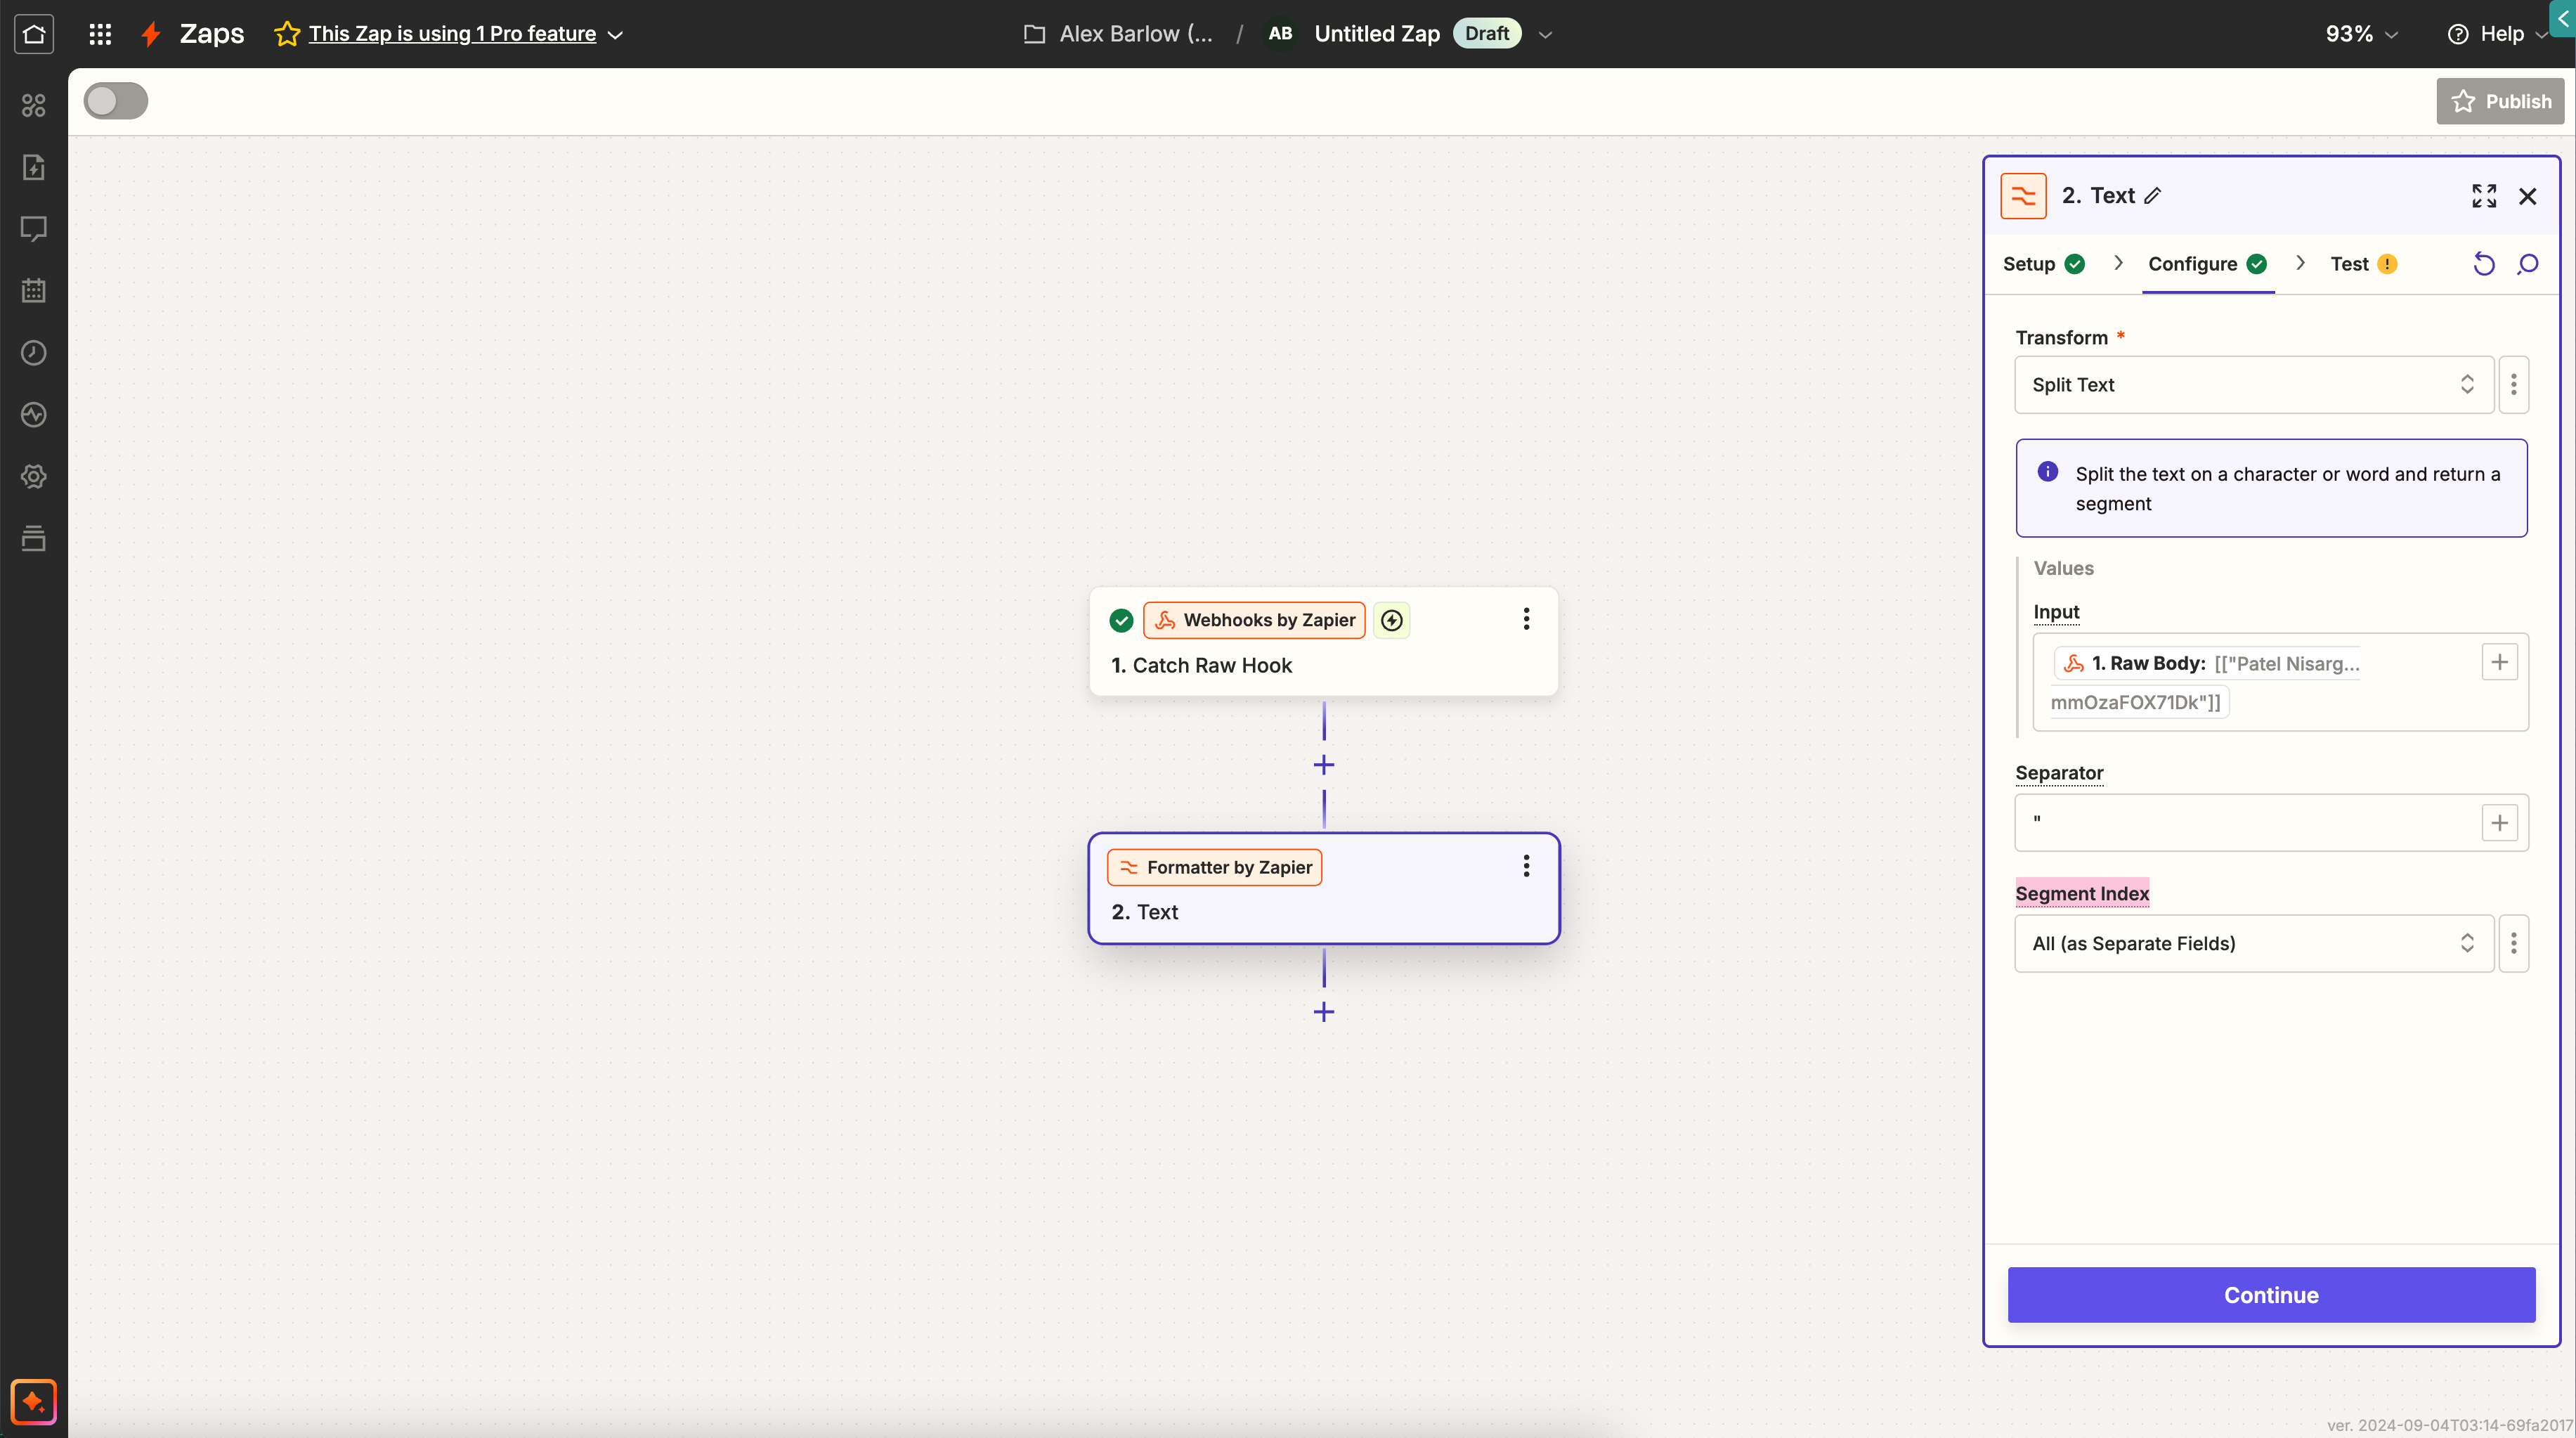
To configure the "Formatter by Zapier" step, follow the steps below:
- Action event - Set to "text".
- Transform - Set to "split text".
- Input - Click "+" and set to "raw body".
- Separator - Click into the field and set to "single speech mark".
- Segment index - Set to "all (as separate fields)".
- Continue - click continue.
- Test - Click "test step".
# Triggering a Zap using an Axiom.ai automation (JavaScript)
For more control, or to receive data back from Zapier, you will need to use a "Write javascript" step.
The code looks like this:
// Input your desired data below
const body = {
  first_name: 'Wade',
  last_name: 'Foster',
  age: 29,
}

// Replace the URL below with the URL of your webhook
const url = 'https://hooks.zapier.com/catch/123456/aDif37'

const rawResponse = await fetch(url, {
  headers: {
    'Content-type': 'application/json',
  },
  method: 'POST',
  body: JSON.stringify(body),
})
let content = await rawResponse.json()

// Manipulate the response data however you wish here.

return [[content]]
Data output from other steps can also be used here. For more information on how to do this, please see Inputting Data to 'Write Javascript'.
# Triggering an Axiom.ai automation from Zapier
An Axiom.ai Pro or above subscription is required to use this function.
To trigger your automations from Zapier, follow the steps below to get started:
- Create a new Zap in Zapier.
- Click the "+" icon to add a new action and search for "Axiom.ai". Select "Run an Axiom.ai" event.
- When prompted, click "Continue" to connect your Axiom.ai account. Follow the on-screen instructions.
- When prompted, enter your Axiom.ai API key and authorise API access.
- Back in your Zap, click the "Action" section of the "Run an Axiom.ai" step and fill in the inputs, as required.
Click "Test step" or "Retest step" to confirm that the step is set up correctly. If successful, you will receive a response including a link to view your automation running.
# Sending data from Zapier to Axiom.ai
To send data from Zapier, follow the steps below:
- Navigate to the "Run an Axiom.ai" step in your Zap workflow.
- Select your automation from the dropdown.
- Input your data into the "Input Column" inputs - you can use Zapier variables here to input data from other steps.
- In your Axiom.ai automation, add a Receive data from another app step to allow you to use the data in your Axiom.ai automation. We recommend filling in the "Test data" input to aid with testing.
# Sending more than 5 data items
There are currently only 5 inputs in the "Run an Axiom.ai" step within Zapier, however, if you wish to send more data this is still possible to do. Follow the instructions below to get started:
- Navigate to the "Run an Axiom.ai" step in your Zap workflow.
- Add your data in Input Column A in the format that can be found below.
[["A1", "B1", "C1","D1", "E1", "F1"]]
You can still make use of dynamic variables in your Zap to send the data to your Axiom.ai automation. An alternative method would be to write the data to a Google Sheet or Excel sheet, and then read this data into your Axiom.ai automation separately.
# Limitations
# Rate limits
To protect our infrastructure and ensure API availability, we impose rate limits on our API. See our Rate Limit (opens new window) documentation for more details.
# Concurrency
Each subscription tier has a limited number of bots that can be ran concurrently on the cloud and unlimted on the desktop, see Pricing for more details on your plans concurrency levels.
# Testing your workflow
To test your workflow, open your Axiom.ai automation and click "Run" to start the automation. Once complete, review any destinations where your data is being sent once it's been processed by Zapier. Alternatively, review your Zap runs within Zapier to confirm the zap ran.
If the desired results have not been achieved, review the Run Reports within Axiom.ai, or the Zap runs section within Zapier.
# Examples
# Sending scraper data from an Axiom.ai automation to Zapier for processing
Extracting data from a webpage and sending it to Zapier to be processed can unlock a huge amount of potential for your workflows. Learn how to get started below.
- Scrape - Create a new Axiom.ai automation, add a scraping step. In this example, we will be using the Get data from a URL step.
- Trigger webhook - Following the instructions above, configure your Zap to be triggered by incoming webhooks. Add a Trigger webhook step and use the "Insert data" option to insert the
[scrape-data]token.
Follow the steps from the Triggering a Zap using an Axiom.ai automation to learn how to process the data that you send to your Zap.
# Write data to Excel
To write data to Excel, follow the steps in Triggering a Zap using an Axiom.ai automation to create your Zap. Once this has been done, head over to your Zap. After the "Formatter by Zapier" step, do the following:
- Excel - Search for "Microsoft Excel" and add a new step to your Zap.
- Action event - Set this to "Add Row".
- Set up - Follow the instructions in the Zap to connect your account and configure your step.
- Configure - To configure your data, head into the "Configure" tab. Click the "+" button beside the "Column" inputs to select your variables.
To test, trigger your automation within Axiom.ai and observe any errors that may occur, or if the automation runs successfully.
# Wrapping up
Using Axiom.ai and Zapier together allows you to scrape data quickly and pass it to over 7,000 apps. With just two steps in each app (four total), you can set up a basic browser scraper to Zapier automation in minutes, which can be easily adapted to more complex use cases.