How to automate Zapier Tables with Axiom.ai
Zapier Tables (opens new window) offers the ability to store data within your Zapier account. This can be used to create interfaces and chatbots that can use your data. Zapier Tables can be used within your Axiom.ai automations similar to how Zapier can be used.
# Getting started
To get started, you will need to have the following steps completed:
- Sign up to Zapier.
- Create a new Table by clicking "Create" and selecting "Table" - create this to meet your own requirements.
To trigger your Axiom.ai automations, you'll need the following:
- API key - The API key is found on the dashboard.
- Automation name - Get the name of the automation you wish to trigger.
- Endpoint - The current endpoint is
https://lar.axiom.ai/api/v3/trigger.
You may require a Zapier subscription and an Axiom.ai subscription to use some of the steps within this guide.
# Working with Zapier Tables data in Axiom.ai
Zapier Zaps can be used to create or modify data automatically within your Tables. Actions within your Zapier Tables can be used to automatically trigger your automations. See the guides below to get started.
# Create a new record
To get started, create your automation as normal, once you are ready to send the data to your Zapier Table, continue this guide.
Create a new Zap that has the ability to catch a webhook that is going to be sent from your automation. Follow the steps below:
- Create Zap - Create a new Zap by navigating to Zapier, and clicking "Create".
- Add trigger - Click "Trigger", then select "Webhooks by Zapier". See the section below for more information on configuring this trigger.
- Trigger webhook - In Axiom.ai, add a Trigger webhook step to your automation. Input the URL from the "your webhook URL" section in Zapier.
Learn more about configuring the "Webhooks by Zapier" trigger:
- Set the "trigger event" to "catch raw webhook", press continue.
- Save the URL in the "your webhook URL" section for later.
Once this has been created, we recommend sending a test request to popular your Zap with test data - hit "Run" on your automation. Next, you'll want to add a "Formatter by Zapier" step to format the incoming data. Set this up as follows:
- Actions - Add your actions to process the data that is being sent to the Zap, for this example, we will be using the "Formatter by Zapier" action.
- Configure - Follow the instructions below to configure the "Formatter by Zapier" action.
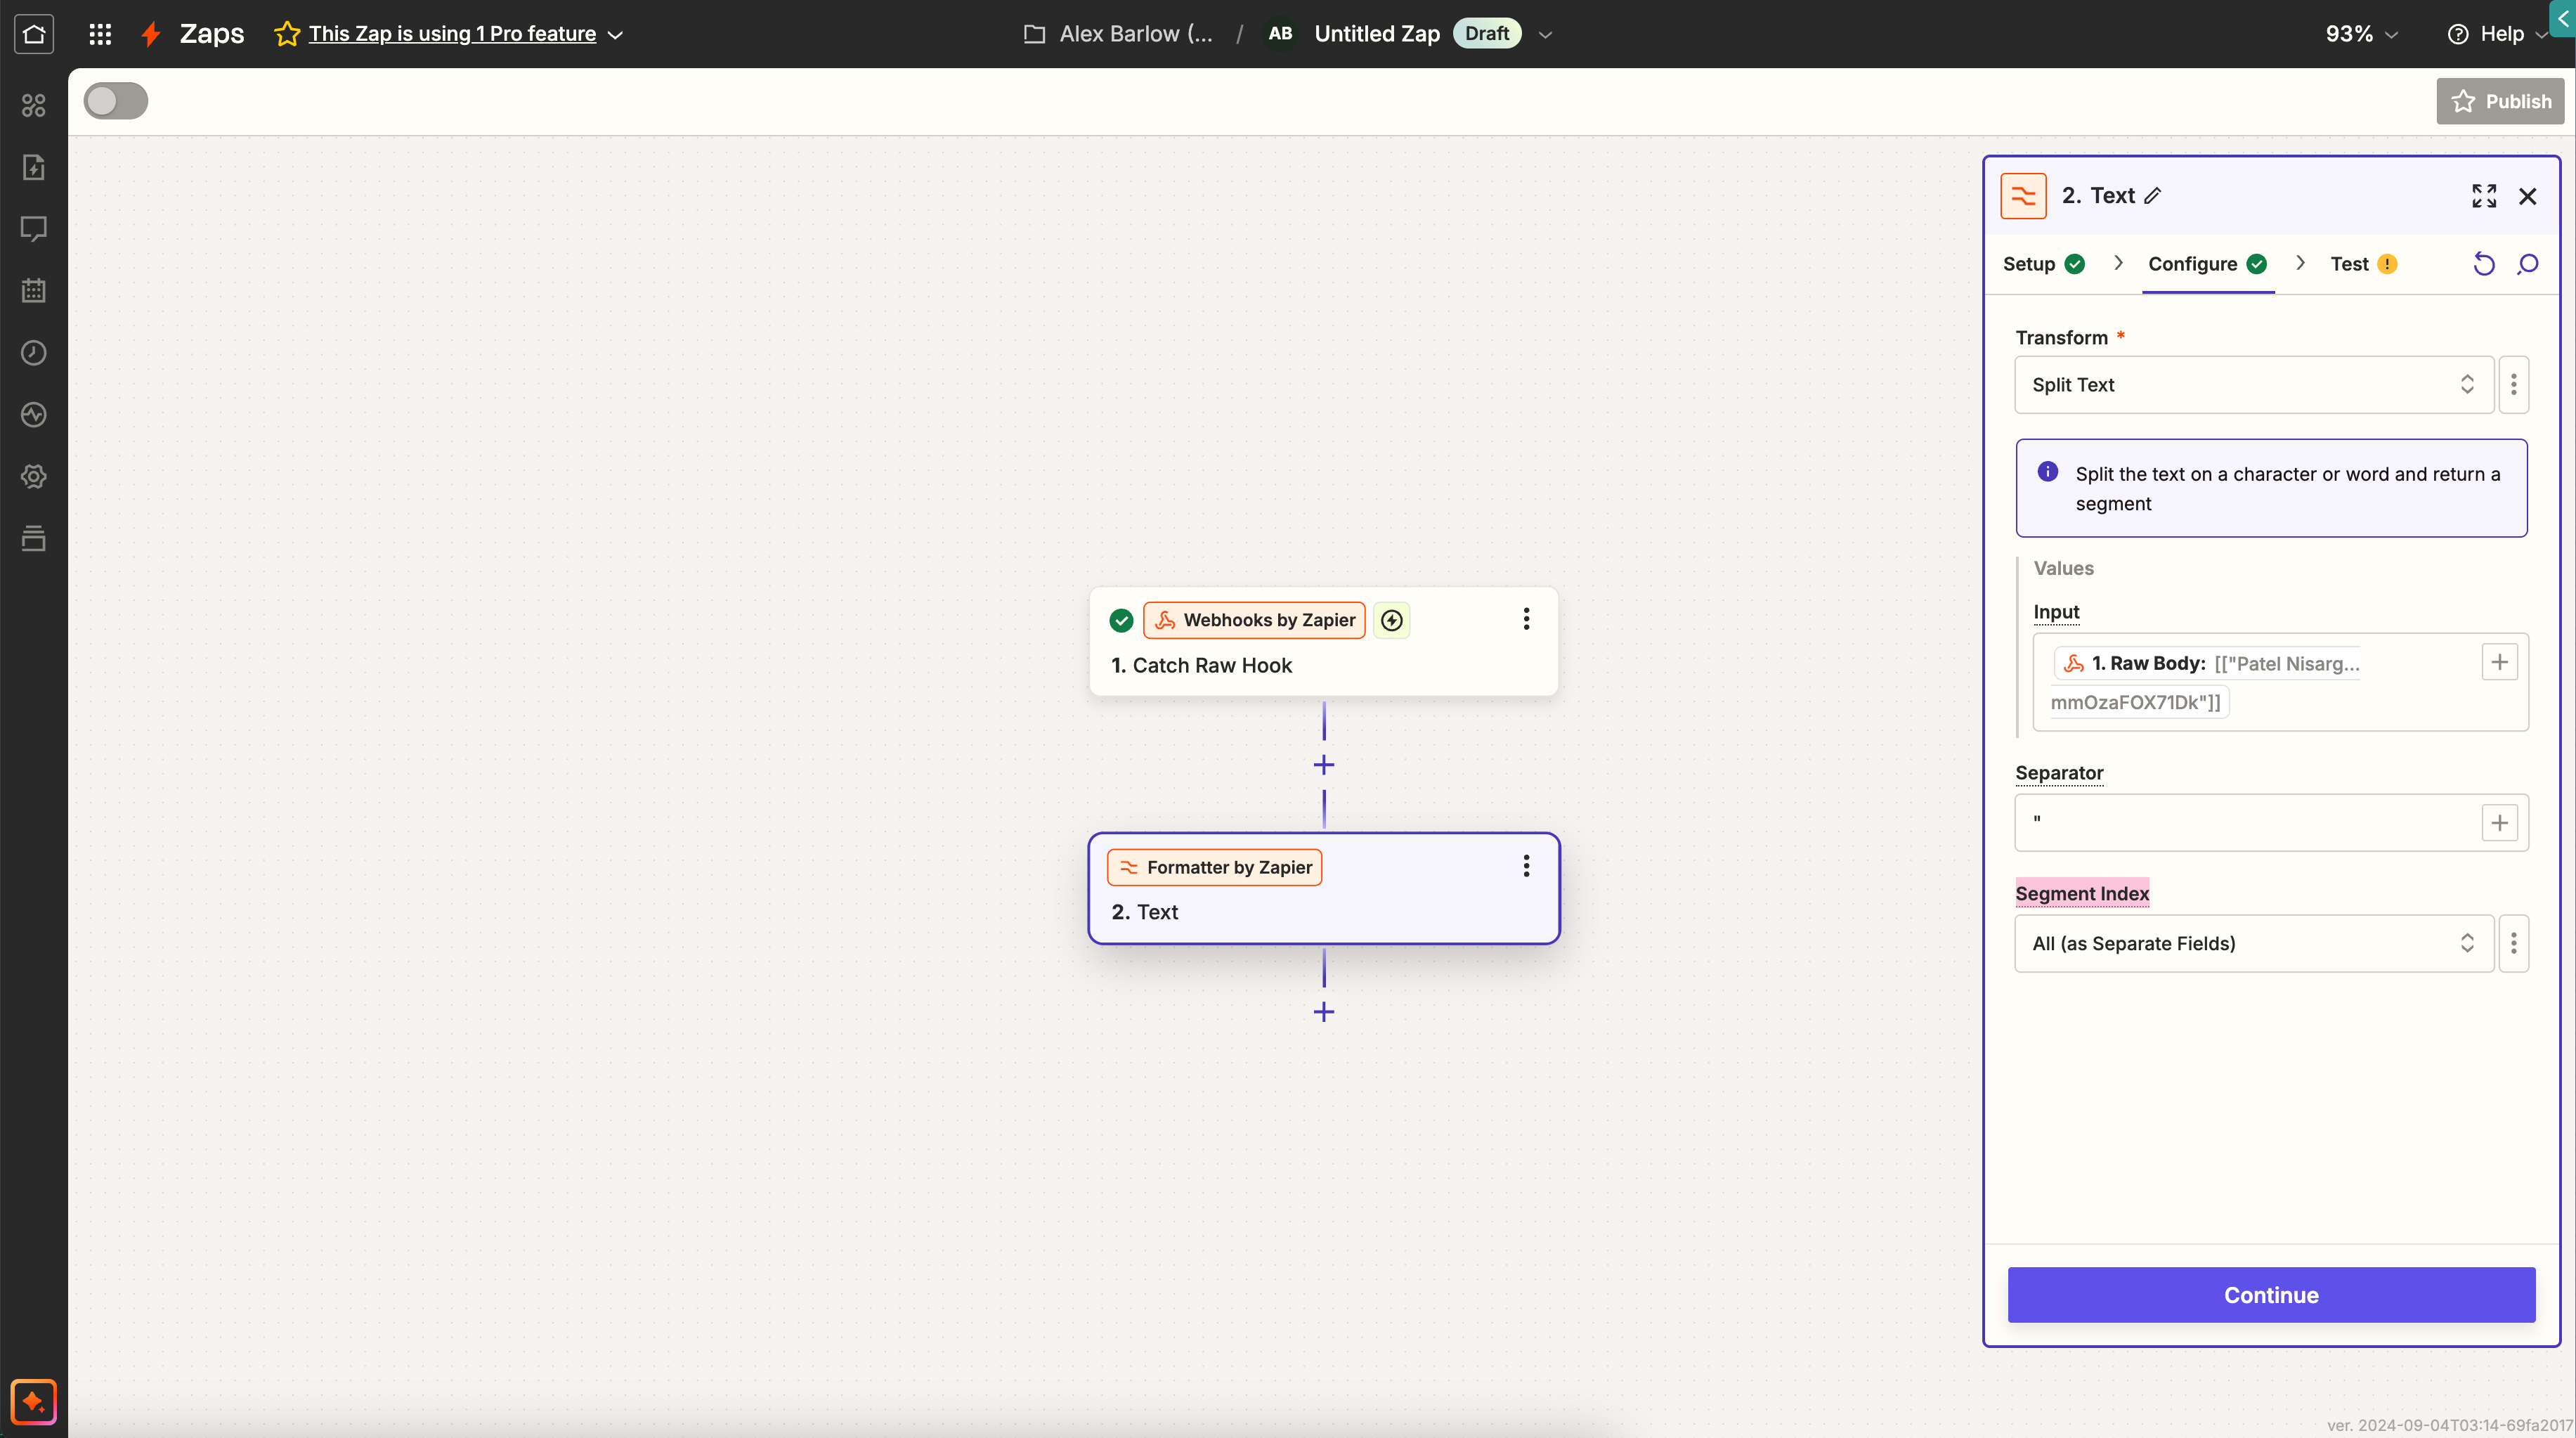
To configure the "Formatter by Zapier" step, follow the steps below:
- Action event - Set to "text".
- Transform - Set to "split text".
- Input - Click "+" and set to "raw body".
- Separator - Click into the field and set to "single speech mark".
- Segment index - Set to "all (as separate fields)".
- Continue - click continue.
- Test - Click "test step".
When you're ready, add a "Create Record" step to your Zap from the "Zapier Tables" category. Navigate to the "Configure" section of this step and set the fields to use the data from the "Formatter by Zapier" step above. This stage will depend on how your Table has been set up.
# Send data to Axiom.ai automation
To get started, create a new "Zap":
- Actions - Add a "Zapier Tables" action to your Zap.
- Configure - Configure the "Zapier Tables" action with a "Trigger event". This can automatically trigger the Zap when a record is created, modified or deleted. This can also be set to be triggered directly from the table itself. Click "Test" to test your trigger.
- Actions - Add an "Axiom.ai" action using the search functionality.
- Configure - Connect your Axiom.ai account, set the "Action event" to "Run an Axiom". Configure the action to input your Zapier Table columns into the "Input column" fields of the action.
Now, set up your Axiom.ai automation:
- Create - Click "+ New Automation" to create a new automation.
- Receive data - Add a Receive data from another app step.
- Configure - Input test data into the "Test data" field, this will assist in the testing.
Continue to create your automation as required, using the data from the "Test data" input to build out an automation that uses your data. When you're ready, click "Run".
# Testing your workflow
To test adding data to your Zapier Table, click "Run" in your automation. If there are errors with your automation, you may find these in the builder or in the Run Report for your run. If there is an error in your Zap, check your Zapier logs for more information on how to continue.
To test triggering your automation from your Zapier Table, run your Zap, or click "Test step" in the "Test" tab of the "Axiom.ai" Zapier step.
Additionally, the resources below may be helpful in debugging your automation:
# Wrapping up
Zapier Tables can be a great alternative to storing your data - with the added benefit of being able to be used within your Axiom.ai automations, and your Zapier Zaps. This opens up powerful opportunities to automate your workflow and get working even faster by integrating Axiom.ai with the vast library of integrations that Zapier offers.
Information accurate as of December 2024.